HushBlur LightMeter User Guide
Learn how to get the most out of your HushBlur LightMeter with our comprehensive guide.
Learn how to get the most out of your HushBlur LightMeter with our comprehensive guide.
Welcome to HushBlur LightMeter. Calibration is NECESSARY to ensure accuracy!
Download HushBlur LightMeter from the Google Play Store and install it on your Android device.
When you first open the app, you'll be asked to grant necessary permissions.
Familiarize yourself with the main screen:
HushBlur LightMeter offers powerful metering capability that work completely on your device. Take advantage of latest digital photography advancement in your analog experience.
Use built in camera with real-time viewfinder for smart metering in any lighting condition.
Modern UI combine traditional electronic meter interface with android system optimizations.
Fine-tune your calibration under different lighting conditions to bridge your android device to your analog camera.
You can save exposure notes while metering. Review the notes to improve your skills.
As we are constantly improving this app, some minor UI changes is not reflected in the screen recordings in this tutorial. In version 1.5.0, we replaced the settings button by the note button in the lower right corner. The settings can now be opened by swiping right!
You may use another (ideally film) camera with a functional light meter or a stand-alone light meter. You may borrow it as it won't be needed after calibration is done.
Print out the calibration board on a white paper, US letter or A4 would work.
Try to fit the paper with the whole image, leaving minimum white edges.
Start the app, click the calibration mode button. You will see a screen with a plot
Switch to manual input mode when needed. You will be able to manually type the aperture and shutter speed
A. After setting the ISO to 100, point your film camera with a functional light meter at the calibration board. Try to fill your viewfinder with the calibration board without showing too much white space on the edge. Take the readout: the aperture and shutter speed
B. Type the aperture and shutter speed readout into your app.
C. While framing the calibration board in your app in the same way you frame your (camera) light meter. Click the ADD button. You will notice a pink dot appears inside the blue circle, representing your latest data point.
D. Repeat step A to C under different lighting conditions, until you have at least 6 data points(pink dots) in a (almost) linear fashion. You may remove wrong data points, or clear all data points with the Remove and Clear button.
The calibration board is updated and the screenshot is showing the older version of the calibration board
After acquiring enough data points. You may click the Calculation button. The line will move. It should go from the top left to lower right, but not perfectly diagonal.
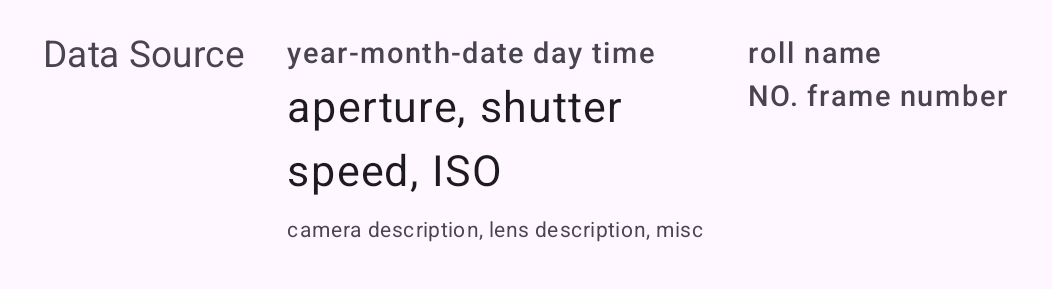
Click the plot. A dialog will pop up and you can take a screenshot of the dialog and manually note down the numbers in the dialog. Save it for later. In case of reinstalling the app, it will be needed.
Now you have the calibration parameters saved. By clicking the gear icon, you can open up advanced setting and check the linear calibration button. In camera mode, you would notice a pink "*" beside your EV100 measurement when the linear calibration is turned on.
Select the camera facing the same direction as the light sensor.
If the interface still shows the input box of A and S for aperture and shutter speed, click it. In the popped up dialog choose Light sensor(automatically read in by the app)
Follow the same steps, except when input the readout from the another physical device, use the readout from your light sensor. The light sensor readout from your light sensor will automatically update. Just make sure you frame the calibration board correctly.
Use the camera as a viewfinder and metering source
We found some of the android devices we tested are more or less "highlight weighted" in its default average metering mode. Those android devices will make exposure decisions based on the highlight of the scene. This means for the scene of high contrast (even when the highlight is a very small part of the scene), the app will give you exposure that might underexposure the overall scene significantly. For instance, a typical landscape scene with trees/grass in the foreground, bright cloud in the background. This behavior won't go away with our calibration function. User might need to add 1-2 stops of exposure in these cases to correctly exposure the film. Another way is to meter multiple times by framing that include/exclude the highlight, then make a 'mental average'.
As of the version 1.7.0. Spot weighted metering is introduced. The "weighted" means the same as in "center weighted metering". It applies a great weight on the spot you clicked but still consider the rest of the image. You may use this function to evaluate the highlights, the midtones and the shadows individually. And determine the correct exposure based on the measurements. You can also use the spot weighted metering function to understand the metering logic of your specific device. We found the devices we have are indeed heavily highlights weighted by default.
Use the ambient light sensor of your device as metering source
Exposure note is a newly(2026/02/20) introduced feature in version 1.5.0. It stores all notes on your device.(Will be deleted after uninstalling) While we have tested it and ensure the basic functions are working as expected, the changes are quite extensive. So it may not be stable. On the other hand, related features are subject to change as we get more feedbacks. In the extreme case, exposure note data might be lost. Therefore, in version 1.6.0, we added a note exporting function to ensure users have the ability to export their notes, as a mean of data backup.
Export exposure notes to a file in "comma-separated values" format.
Solutions for common issues you might encounter.
Yes, it's necessary. Hardware and lower level camera interface implementation differs from one manufacturer to another. Without calibration, the readout from camera feed can be off by a lot!
Yes, it's only going to affect camera mode readout. Ambient light readout, used in sensor mode is not affected.
No, all image processing happens locally on your device, then discarded. An internet connection is only required for downloading the app and future updates.
No, all processing is done locally and no images are uploaded to any server.
Yes, you can install HushBlur LightMeter on multiple Android devices using the same Google account. Each installation works independently.
Some camera might not fully support the feature we requires, so we add this to alert the users. Sometimes, on older device, the lower level software is not compatible with this app.
Our support team is here to assist you with any questions or issues.
Contact us directly at the following email for personalized assistance: